The other week I had my friends over and I was a wee bit embarrassed when I showed them my studio. My husband and I bought our house a year ago and my studio ended up kind of being the place where we just put all of the extra furniture. I realized that I had to de-clutter the room, which would therefore de-clutter my brain and allow me to be more creative, more focused, and more efficient. Here’s a glimpse of what I’ve done. I must first give credit to the thrifty decor chick for inspiring me to do such an easy project. I love the look of Pottery Barn’s bookshelf desk, but don’t quite like their price tag. Thanks to the thrifty decor chick’s easy directions and great photos, I was able to create my own similar desk, without hearing a huge cha-ching on the credit card. As I’ve mentioned throughout my blog, I love color. My studio was previously a drab neutral brown. Although calming and nice, I prefer lots of color, and the colors I selected (Benjamin Moore’s Bermuda Teal) make me think I’m on a warm sunny island sipping strawberry daiquiris. Yes, please! Let me know what you think of the almost finish product of my studio make over!

I got lots of ideas from Pinterest, including the peg board behind my desk. Instead of always digging for scissors or ribbon, I’ve got them right in front of my eyes.
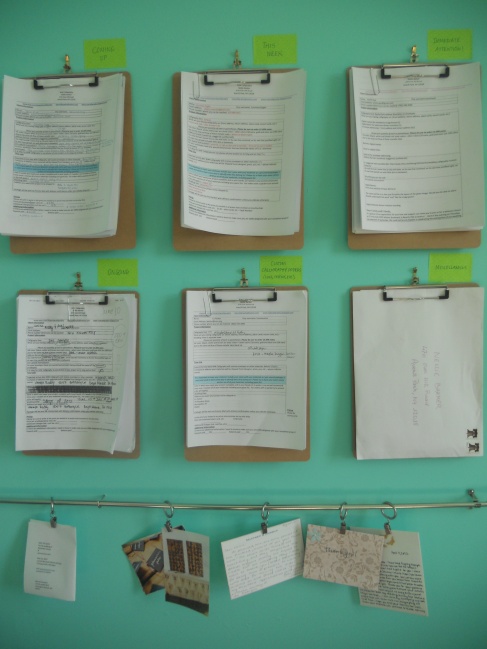
I really need to see things visually to stay organized, so instead of having my Whoa Nellie Press order forms in a big pile or in a paper sorter, I have them hanging up on clipboards. Each clipboard is categorized as “Needs Immediate Attention” or “Due This Week” or “Coming Up”, etc. Then down below is a simple inexpensive curtain rod for more hanging storage. Right now I have various thank you notes and photographs my clients have sent me which give me daily inspiration.
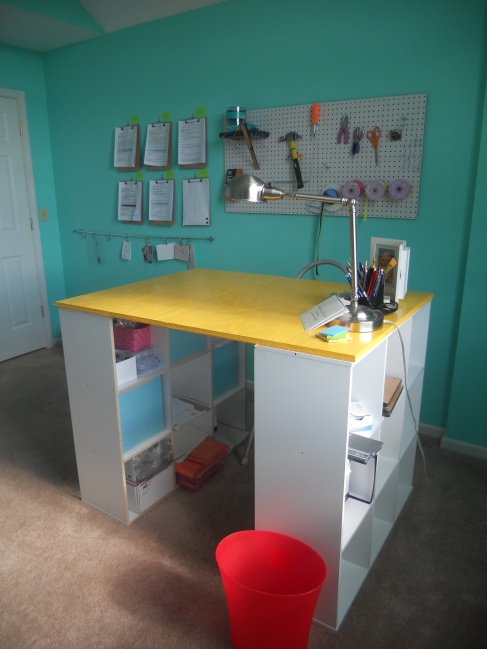
The Desk – I love to be at counter height for some reason, so this desk is perfect. It was a piece of cake to make and pretty cheap too! All it is are two “Martha Stewart Living” bookcases that I bought at Home Depot for about $50 each. They are easy to assemble with a screw gun. Then, while I was at Home Depot I bought a full sheet of 3/4 inch oak plywood (I wanted a sturdy weight plywood so it would last and not sag). They cut it to my specified sizes (and since I made two desks as you’ll see they made a few cuts – I believe 3′ X 5′ and 3′ X 4′, and then I still have one remaining piece for another DIY project). I primed and painted the plywood a nice sunshine orange color.
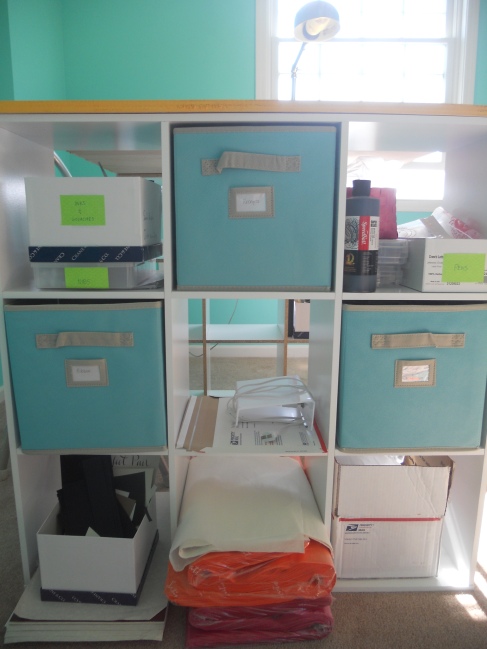
This could be a little more clutter-free, but it’s perfect for what I need it for. There’s a whole shelf on the other side of the desk that I’m barely using. These shelves are perfect for storing my ink, pen nibs, paper and more. I’m sure they’ll get filled up soon!

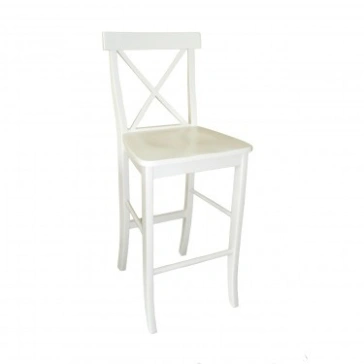
Whaala! A great desk with lots of storage! What’s missing? My chair! We went to 3 different Target stores today in search of a white chair. No luck, so here’s what I bought online. What do you think?
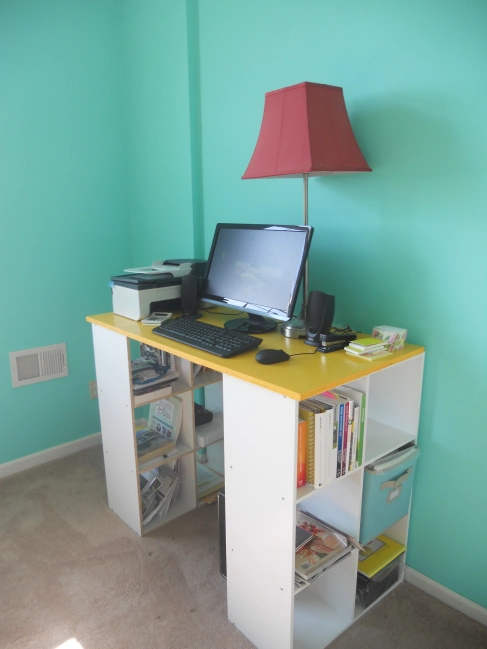
Desk number two for the computer. Same exact style, just a little bit narrower, perfect for the computer and printer to fit on.
What I’ve chosen to leave out is the big white bookshelves on the end of the room that are still being organized, but once that’s complete (whenever that may be!), I’ll be sure to share. What is the home decor DIY project you’re most proud of?

 First…colors. Purple and gold are a winning combination for a masquerade themed wedding. Source
 Next, find the perfect bride and groom mask. Source
 Have plenty masks awaiting your guests. Gold and silver masks add to the elegance. Source
 DIY mask: directions/source


